Delivery Promise
Adding the Delivery Promise Block to your Shopify Checkout
Billing for Delivery Promise
Delivery Promise A/B Testing
Delivery Promise Frequently Asked Questions
Disabling the Shopify "Shipping Speed" in Checkout
Setting Up Delivery Promise
Setting Up the Wonderment Delivery Promise on Your Product Page
Getting Started
How to Edit or Update Your Tracking Page
Launching Wonderment with Klaviyo
Setting Up Two-Factor Authentication
Signing Up For The App
Step 1: Settings & Integrations
Step 2: Create a New Storefront Tracking Page 📦
Step 3: Launching Wonderment
Wonderment Overview & CX Training
Integrations
Attentive
Attentive - What data is available inside of Attentive events?
Capturing SMS consent on Wonderment Tracking Pages with Attentive SMS + Klaviyo
Integrating Wonderment with Attentive
Starting Templates for Attentive SMS
Corso
Fairing
Gorgias
Iterable
Judge.me
Junip
Klaviyo
Adding SMS to Wonderment-Driven Klaviyo Flows
Approving Klaviyo Email Notifications
Capturing Marketing consent on Wonderment Tracking Pages with Klaviyo Forms
Common Date Formatting In Klaviyo
Creating A Split Shipment Email
Integrating Wonderment with Klaviyo
Klaviyo "Tracking Page Viewed" Event And Flow Template
Klaviyo Flow Performance Reporting
Klaviyo Transactional Revenue Reporting
Setting Up Fulfillment Delayed Alert in Wonderment
Starting Templates for Klaviyo SMS
Upgrading Your Klaviyo Integration
What data is available inside of Klaviyo events?
Wonderment Best Practice Flows
Loop Returns
Okendo
Postscript
Capturing SMS consent on Wonderment Tracking Pages with PostScript SMS + Klaviyo
Integrating Wonderment with Postscript
Starting Templates for PostScript SMS
Rebuy
Recart
Sendlane
Slack
Stamped.io
Webhooks
Yotpo
Zendesk
Listrak / Wonderment Integration Setup
Reporting
Add a Delivery Experience Survey to your Tracking Page
Creating A Delivery Feedback Survey
Scheduled Reporting
Shipping
What carriers does Wonderment support?
What shipping and delivery events does Wonderment support?
Why send your own shipping notifications?
Shopify
Disable Shopify's default shipping notification emails
How does Wonderment handle privacy requests for customer data?
How to exclude orders from the Shopify POS
Shopify Flow Setup with Wonderment
Shopify Fulfillment Events and Order Tags in Wonderment
✉️ Update the Shopify notification emails
Tracking Page
Storefront Tracking
Shopify Native
Storefront Extensions
Tracking Block
Troubleshooting
Using A Subdomain For Your Tracking Page
What files does Wonderment add to my Shopify store?
Wonderment Tracking Page Authentication and TrackingTokens
Wonderment Hosted Tracking Pages
Intro to Tracking Pages
Tracking Page Quick Launch Guide
- All Categories
- Delivery Promise
- Setting Up Delivery Promise
Setting Up Delivery Promise
 Updated
by Brian Whalley
Updated
by Brian Whalley
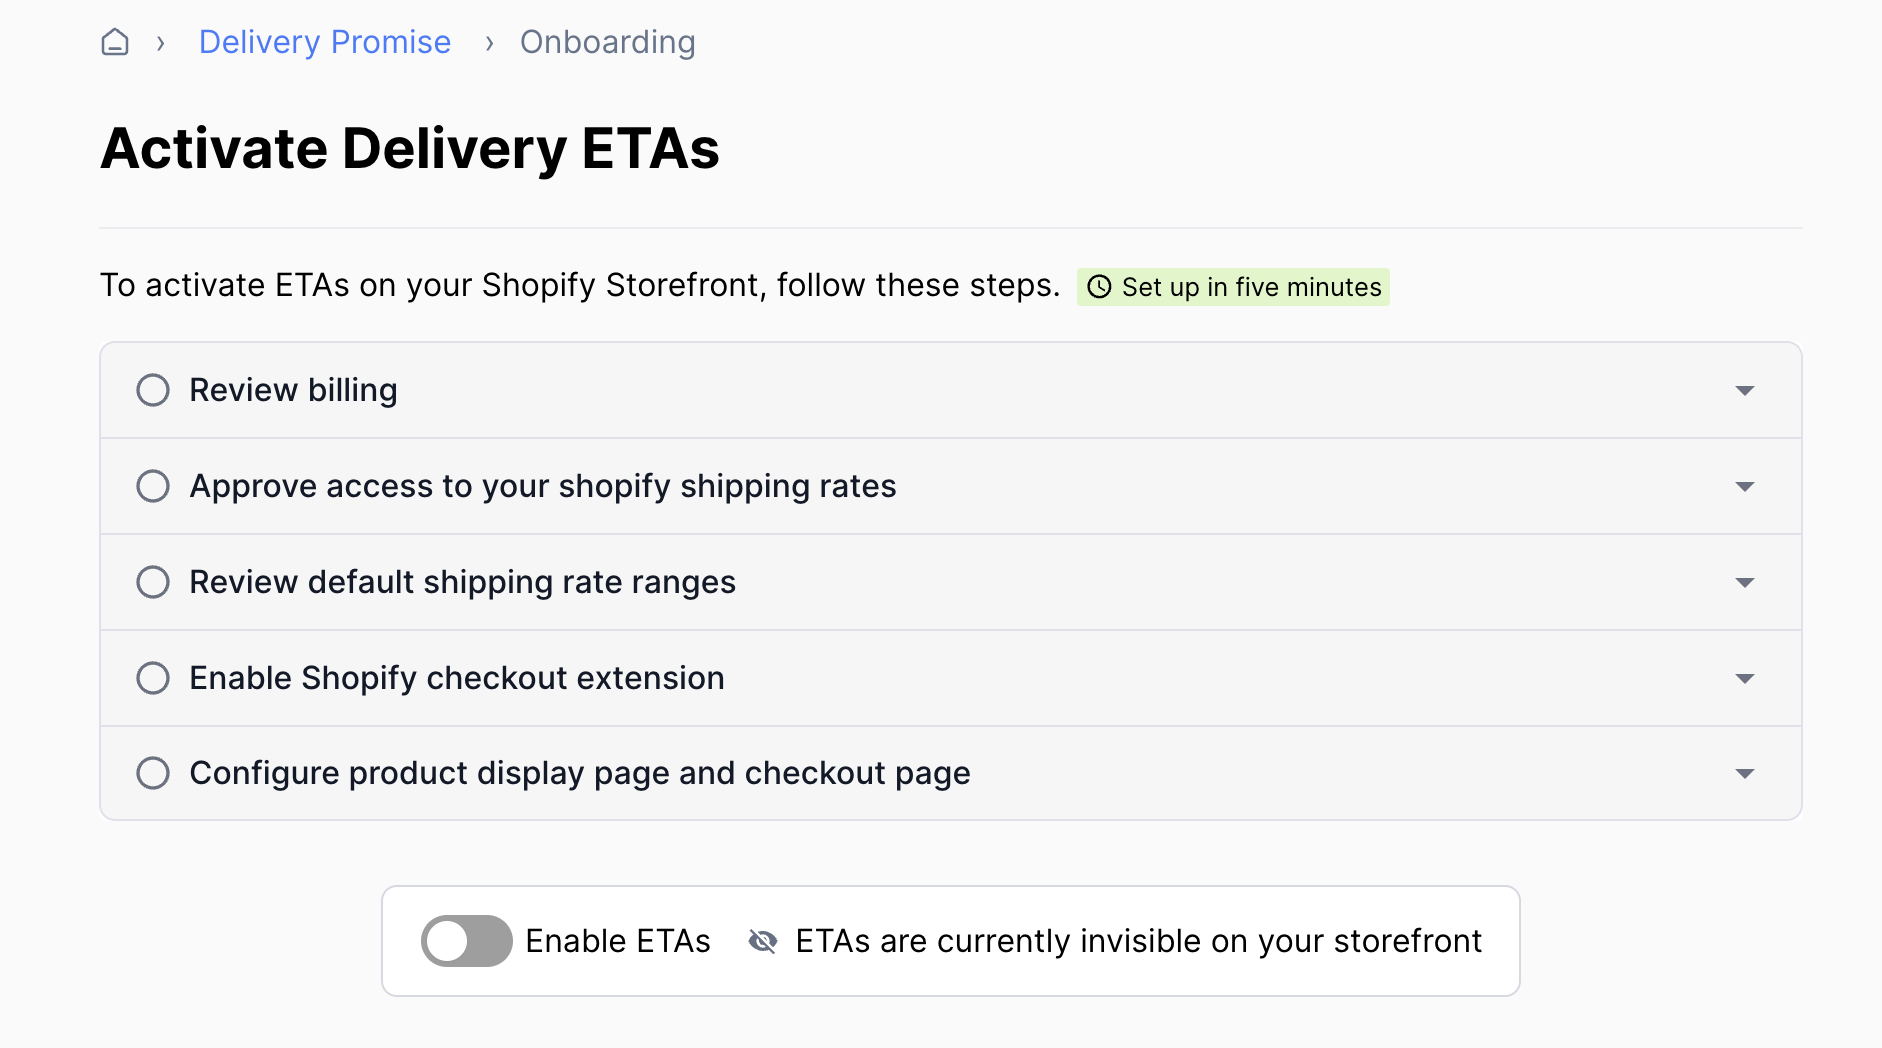
There are five steps to configuring Delivery Promise for your store. You can follow these steps from Delivery Promise Onboarding.
First, ensure that the Wonderment app has all of the necessary permissions from Shopify, which gives Wonderment access to your shipping service level data.
Adding the new permission requires the "Manage Apps" permission in Shopify.
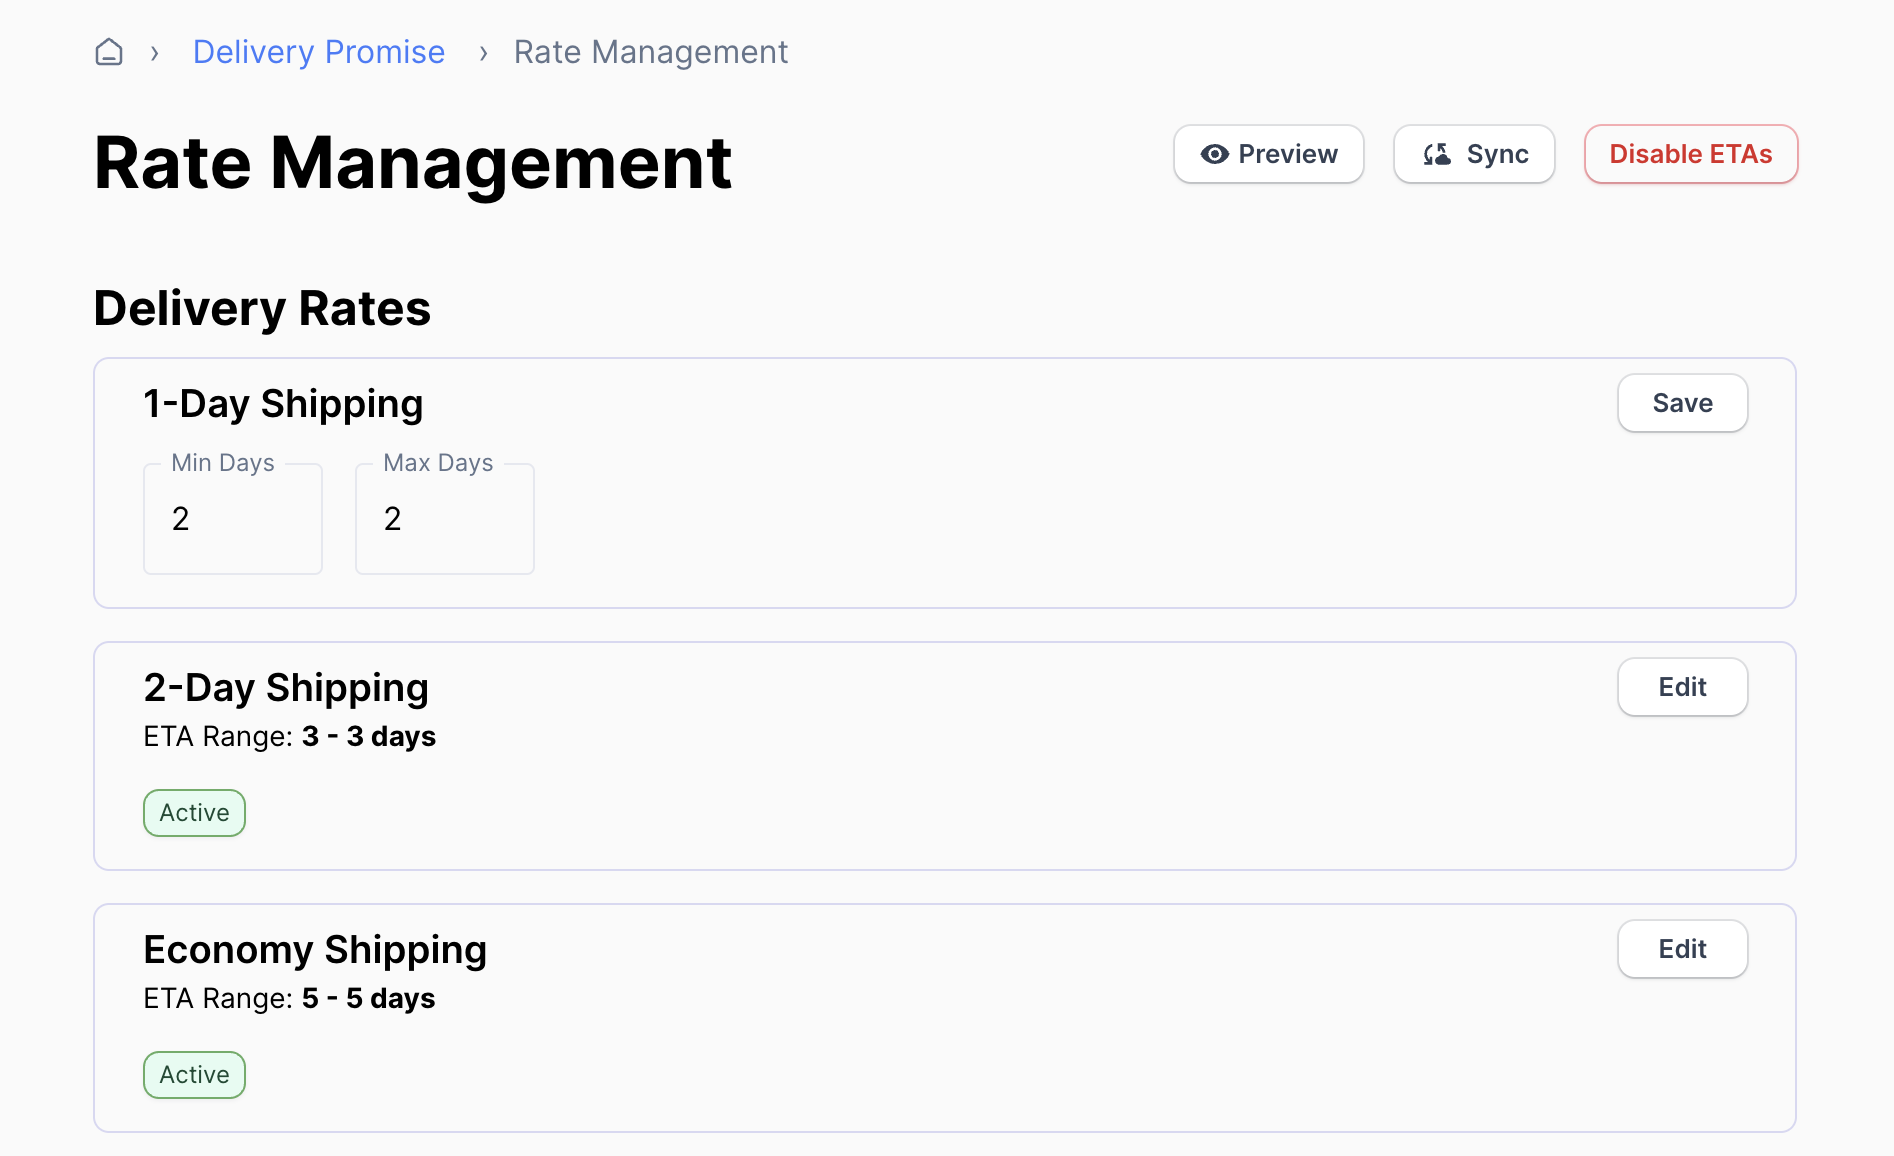
Second, review the default settings for your delivery estimates in Rate Management. These defaults will only be used if Wonderment can't calculate a delivery estimate using our model, such as orders to remote areas where you have no recent deliveries. Delivery estimates are recalculated automatically every day.
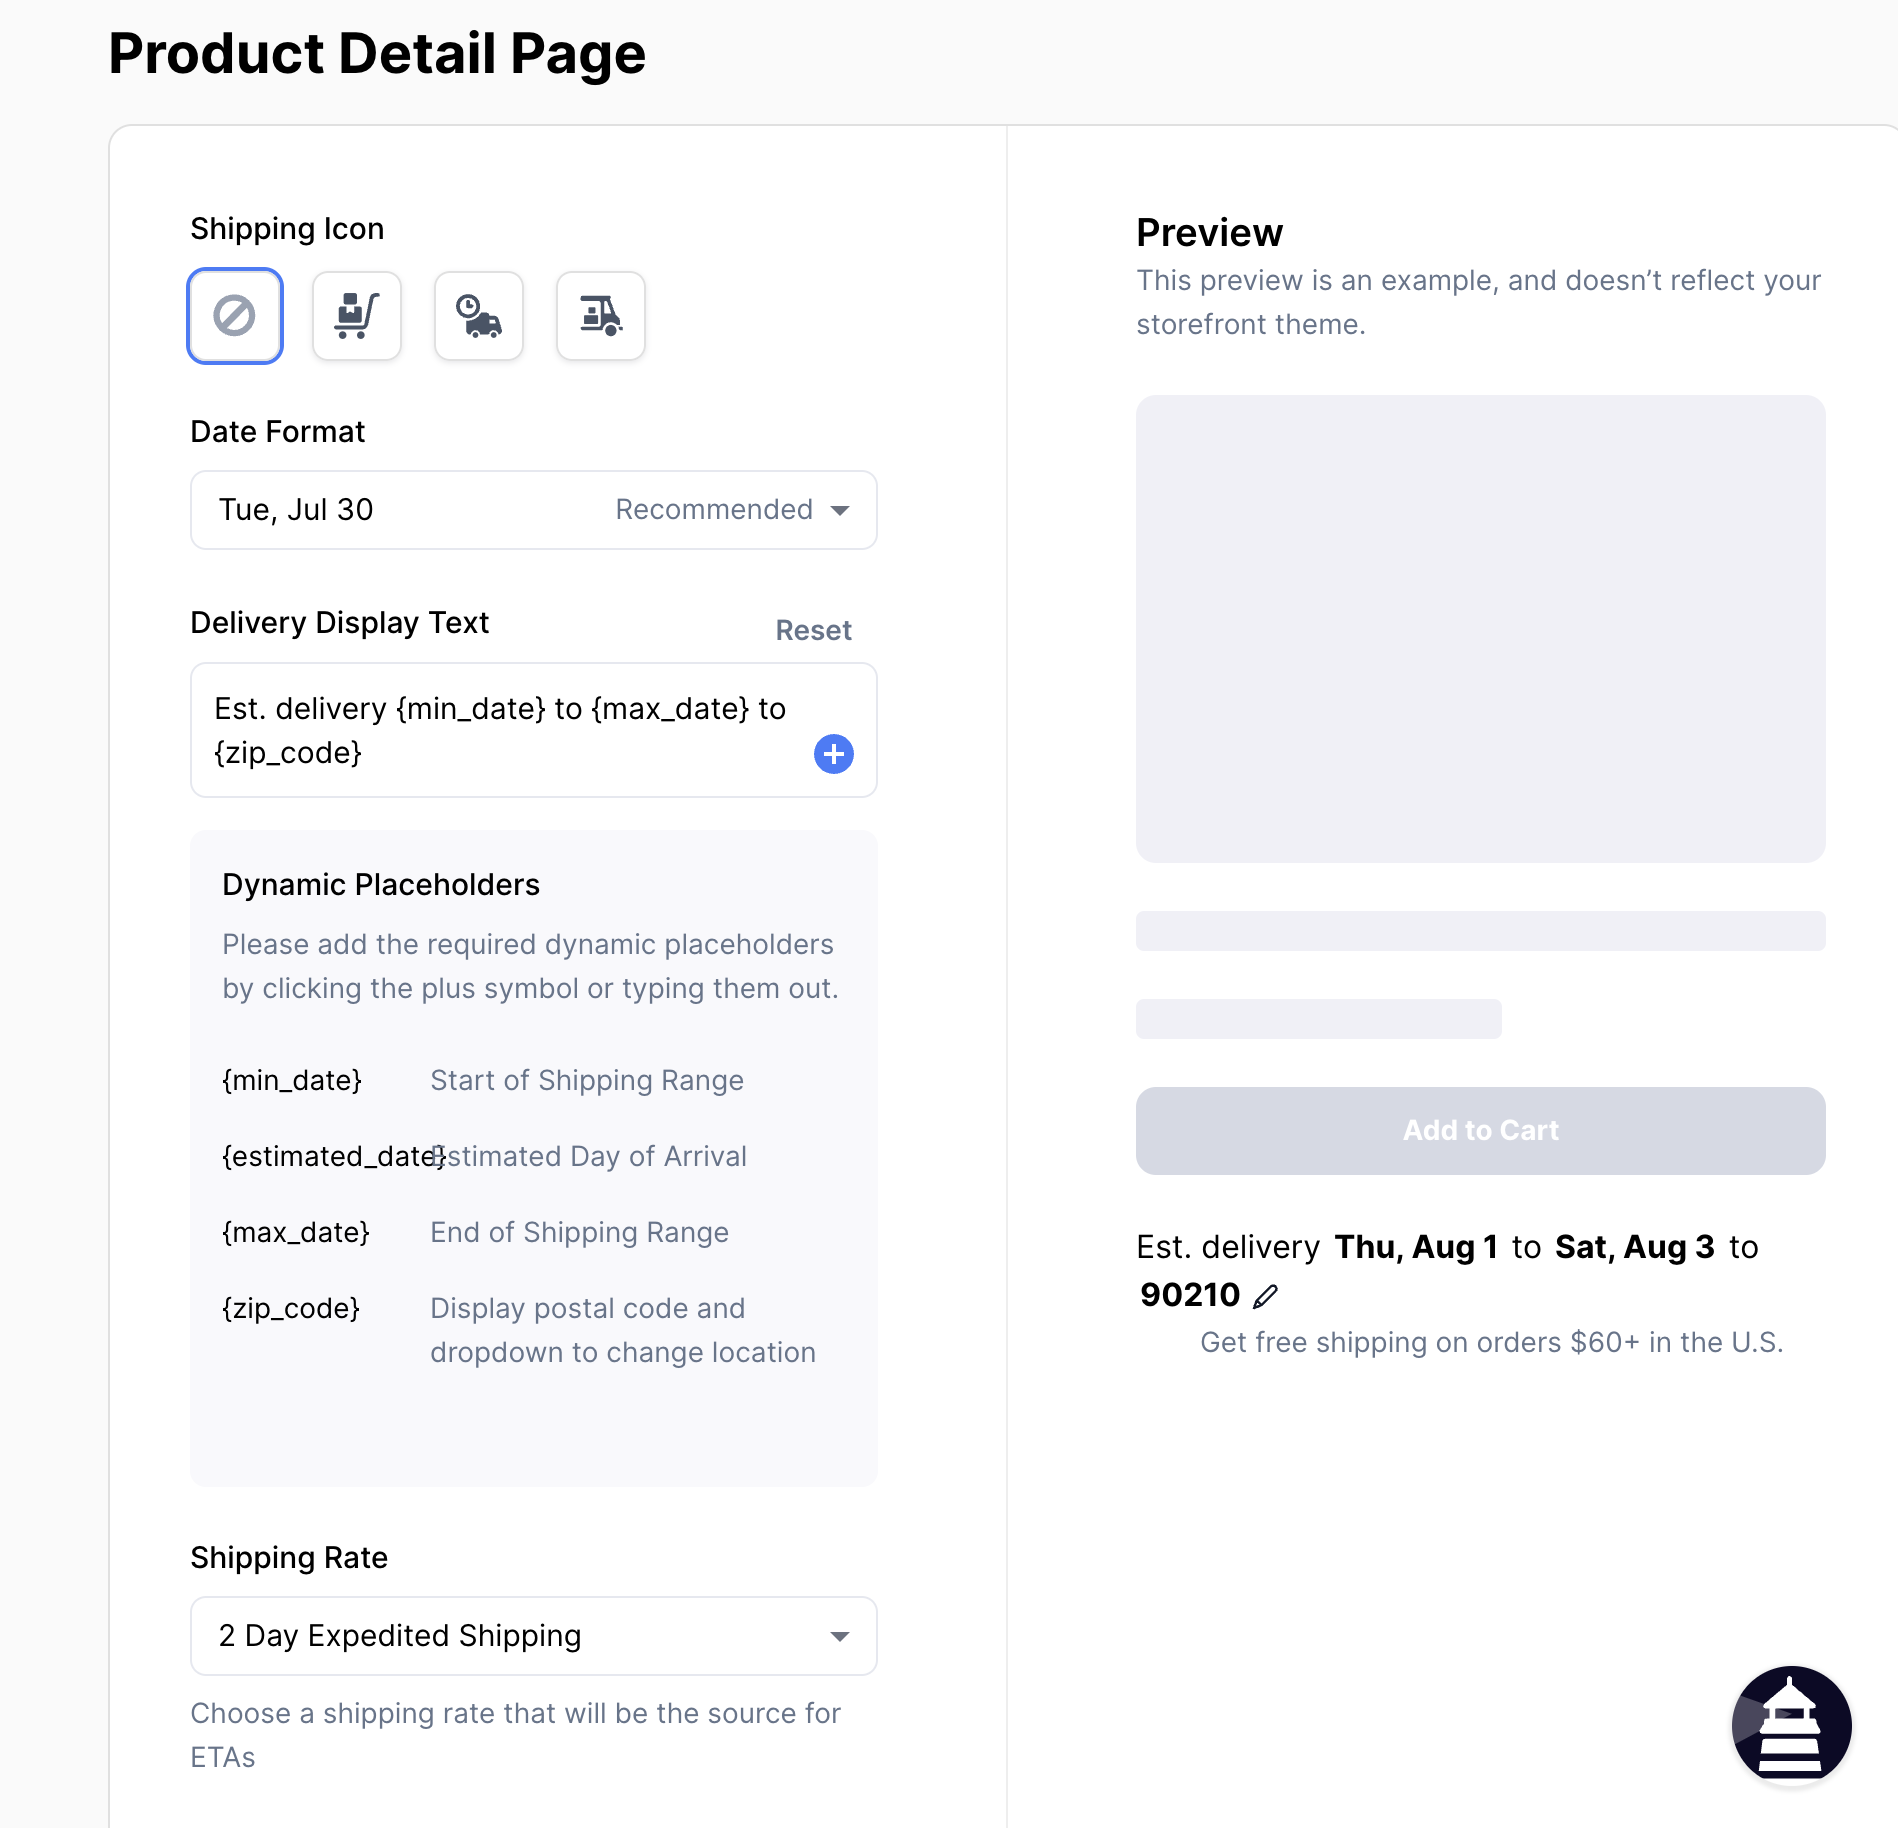
Third, you can configure and add the Product Page block to your product pages. You can configure the block settings in Product Detail Page in Wonderment. For more detailed information on the block's settings and adding it, visit our dedicated article on the PDP Block.
Fourth, if you're on Shopify Plus and have migrated to Checkout Extensibility, you can add the Delivery Promise block to your checkout and show ETAs in the checkout flow. Open the Shopify Theme Editor, navigate to Checkout -> Shipping and add the App Block. More detailed instructions are here.
Next, activate Delivery Promise billing. If you're a customer coming from the Early Adopter or Feedback Session program, you'll see your discounted pricing reflected here, before going to Stripe to securely enter your billing information.
Finally, enable delivery estimates in Wonderment on the Onboarding screen. Once enabled, customers will see Wonderment-powered delivery estimates in checkout. You can come back and modify the settings at any time for immediate effect.