Delivery Promise
Adding the Delivery Promise Block to your Shopify Checkout
Billing for Delivery Promise
Delivery Promise A/B Testing
Delivery Promise Frequently Asked Questions
Disabling the Shopify "Shipping Speed" in Checkout
Setting Up Delivery Promise
Setting Up the Wonderment Delivery Promise on Your Product Page
Getting Started
How to Edit or Update Your Tracking Page
Launching Wonderment with Klaviyo
Setting Up Two-Factor Authentication
Signing Up For The App
Step 1: Settings & Integrations
Step 2: Create a New Storefront Tracking Page 📦
Step 3: Launching Wonderment
Wonderment Overview & CX Training
Integrations
Attentive
Attentive - What data is available inside of Attentive events?
Capturing SMS consent on Wonderment Tracking Pages with Attentive SMS + Klaviyo
Integrating Wonderment with Attentive
Starting Templates for Attentive SMS
Corso
Fairing
Gorgias
Iterable
Judge.me
Junip
Klaviyo
Adding SMS to Wonderment-Driven Klaviyo Flows
Approving Klaviyo Email Notifications
Capturing Marketing consent on Wonderment Tracking Pages with Klaviyo Forms
Common Date Formatting In Klaviyo
Creating A Split Shipment Email
Integrating Wonderment with Klaviyo
Klaviyo "Tracking Page Viewed" Event And Flow Template
Klaviyo Flow Performance Reporting
Klaviyo Transactional Revenue Reporting
Setting Up Fulfillment Delayed Alert in Wonderment
Starting Templates for Klaviyo SMS
Upgrading Your Klaviyo Integration
What data is available inside of Klaviyo events?
Wonderment Best Practice Flows
Loop Returns
Okendo
Postscript
Capturing SMS consent on Wonderment Tracking Pages with PostScript SMS + Klaviyo
Integrating Wonderment with Postscript
Starting Templates for PostScript SMS
Rebuy
Recart
Sendlane
Slack
Stamped.io
Webhooks
Yotpo
Zendesk
Listrak / Wonderment Integration Setup
Reporting
Add a Delivery Experience Survey to your Tracking Page
Creating A Delivery Feedback Survey
Scheduled Reporting
Shipping
What carriers does Wonderment support?
What shipping and delivery events does Wonderment support?
Why send your own shipping notifications?
Shopify
Disable Shopify's default shipping notification emails
How does Wonderment handle privacy requests for customer data?
How to exclude orders from the Shopify POS
Shopify Flow Setup with Wonderment
Shopify Fulfillment Events and Order Tags in Wonderment
✉️ Update the Shopify notification emails
Tracking Page
Storefront Tracking
Shopify Native
Storefront Extensions
Tracking Block
Troubleshooting
Using A Subdomain For Your Tracking Page
What files does Wonderment add to my Shopify store?
Wonderment Tracking Page Authentication and TrackingTokens
Wonderment Hosted Tracking Pages
Intro to Tracking Pages
Tracking Page Quick Launch Guide
- All Categories
- Integrations
- Webhooks
- Webhooks Example: Zapier
Webhooks Example: Zapier

Example: Setting Up Webhooks With Zapier
The first step when setting up webhook support is to create your destination address for the data. Using a webhook involves supplying Where’s My Order with the URL to send data to. Open a window to Wonderment’s Settings screen, and the webhook screen of your app.
In our example, we’ll use Zapier’s Webhooks by Zapier trigger to receive data about a stalled shipment, parse it for a verification key, and then send it to a Google Spreadsheet.
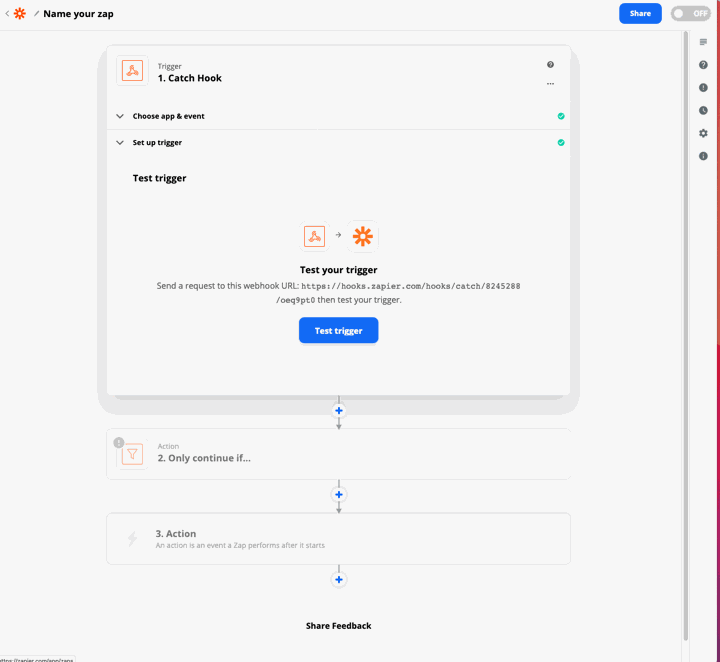
First, create a new Zap and pick “Webhook” as the Zap trigger. When you need to select a Trigger Event, pick “Catch Hook”.
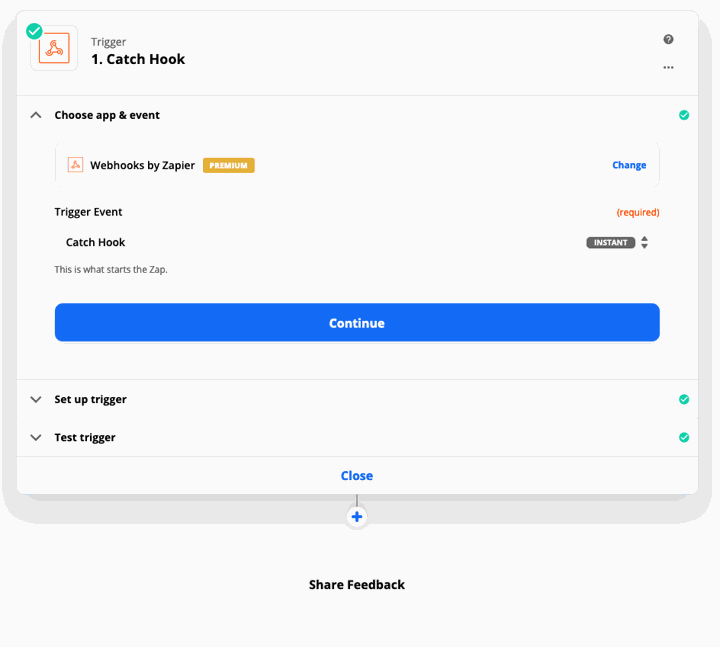
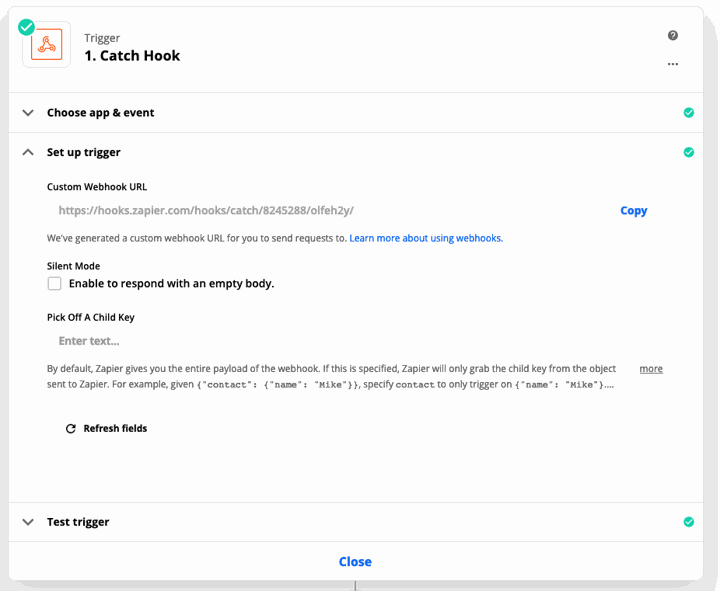
Click Continue, and Zapier will give you the URL to post to for your webhooks. Copy this URL using the button provided. You don’t need to configure anything else on this step.
Return to Wonderment’s settings screen. Pick the event type that you’re interested in, and paste in the URL. Click “Add Webhook”
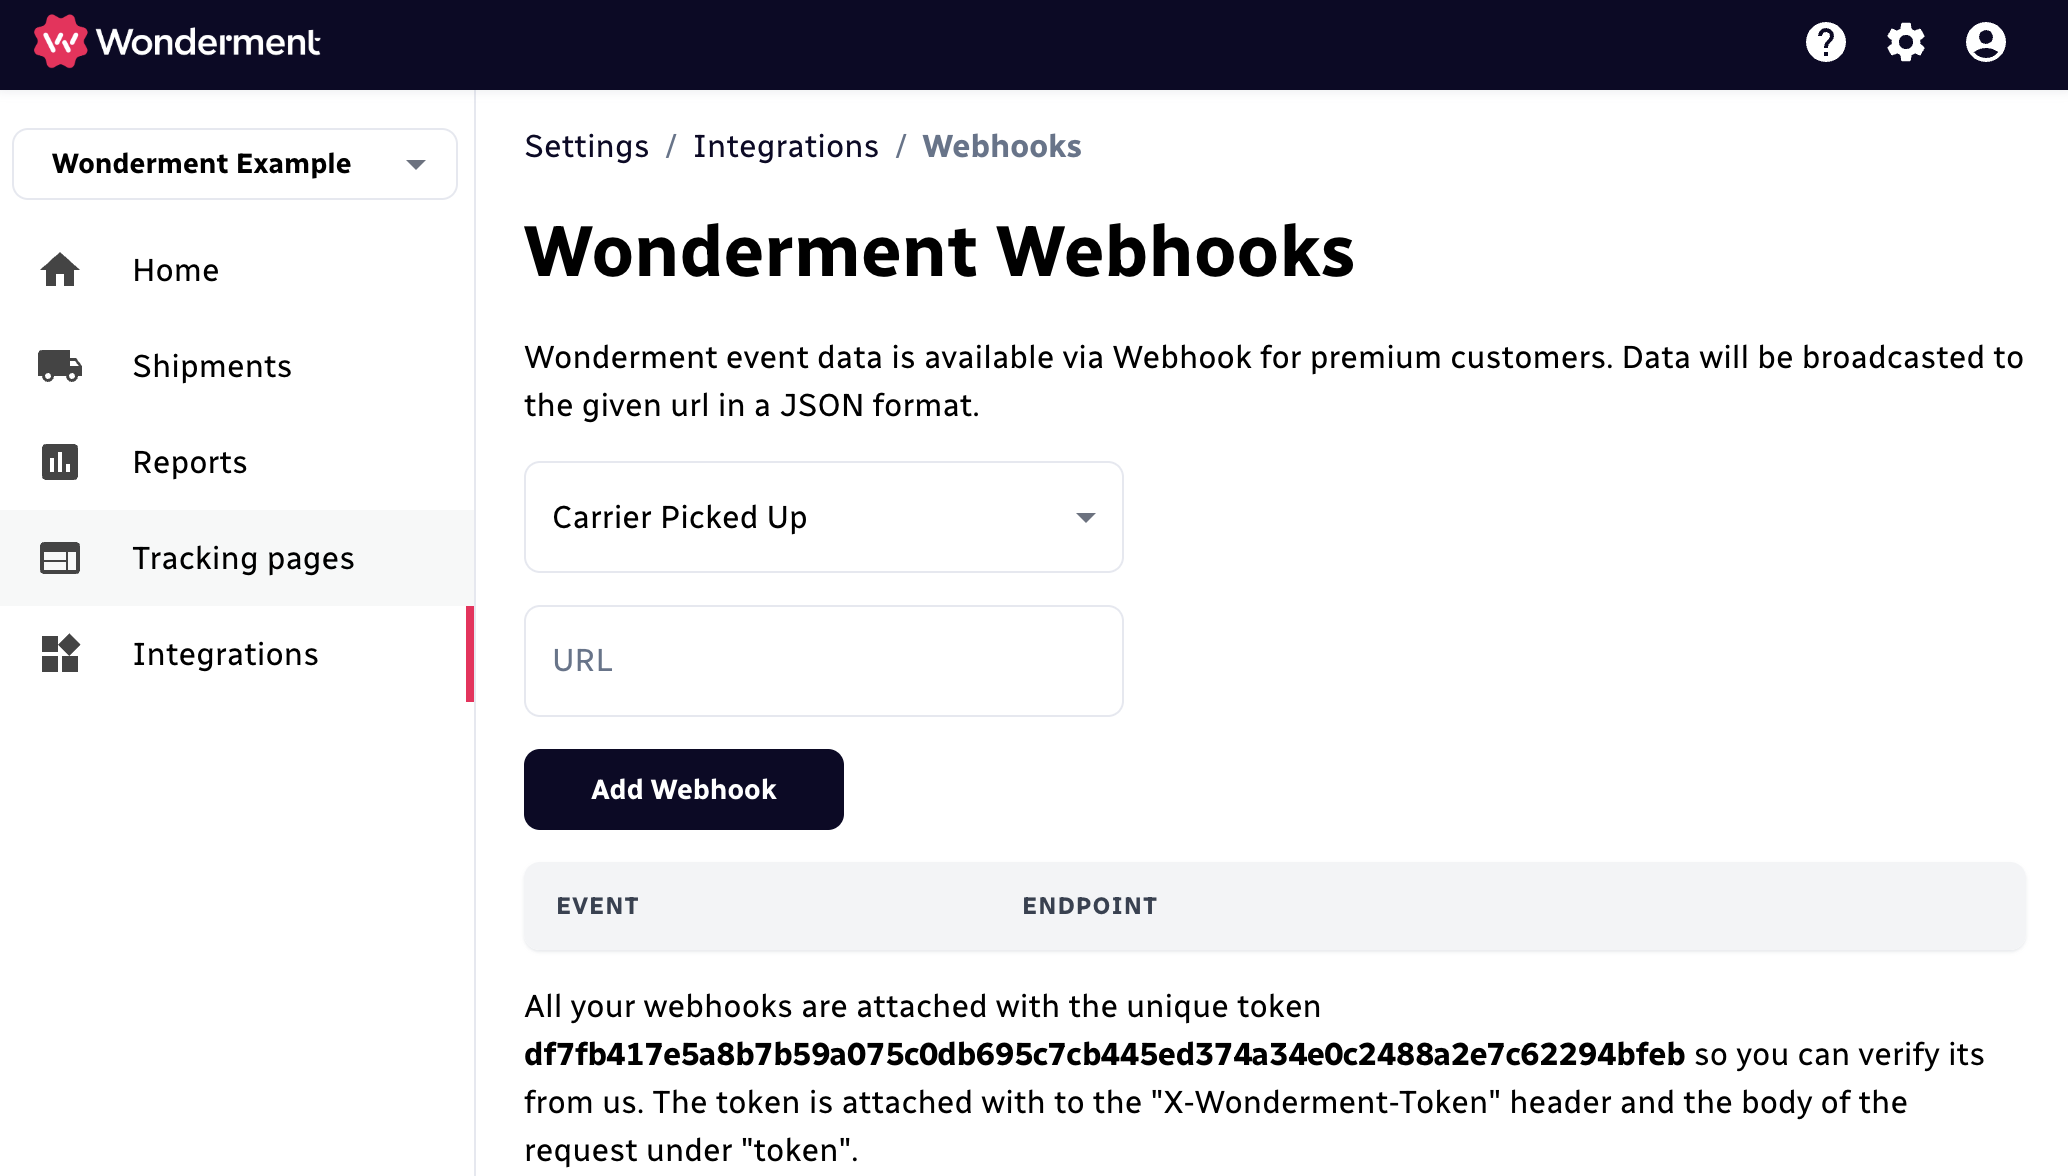
The webhook will be listed in the space below. Click “Send Test Request” to send an example request on to the destination platform, to ensure that everything is entered properly. Note - If you’d like to receive data at this webhook address for multiple shipping events, repeat this step for each event you are interested in. You can use the same URL for each event.
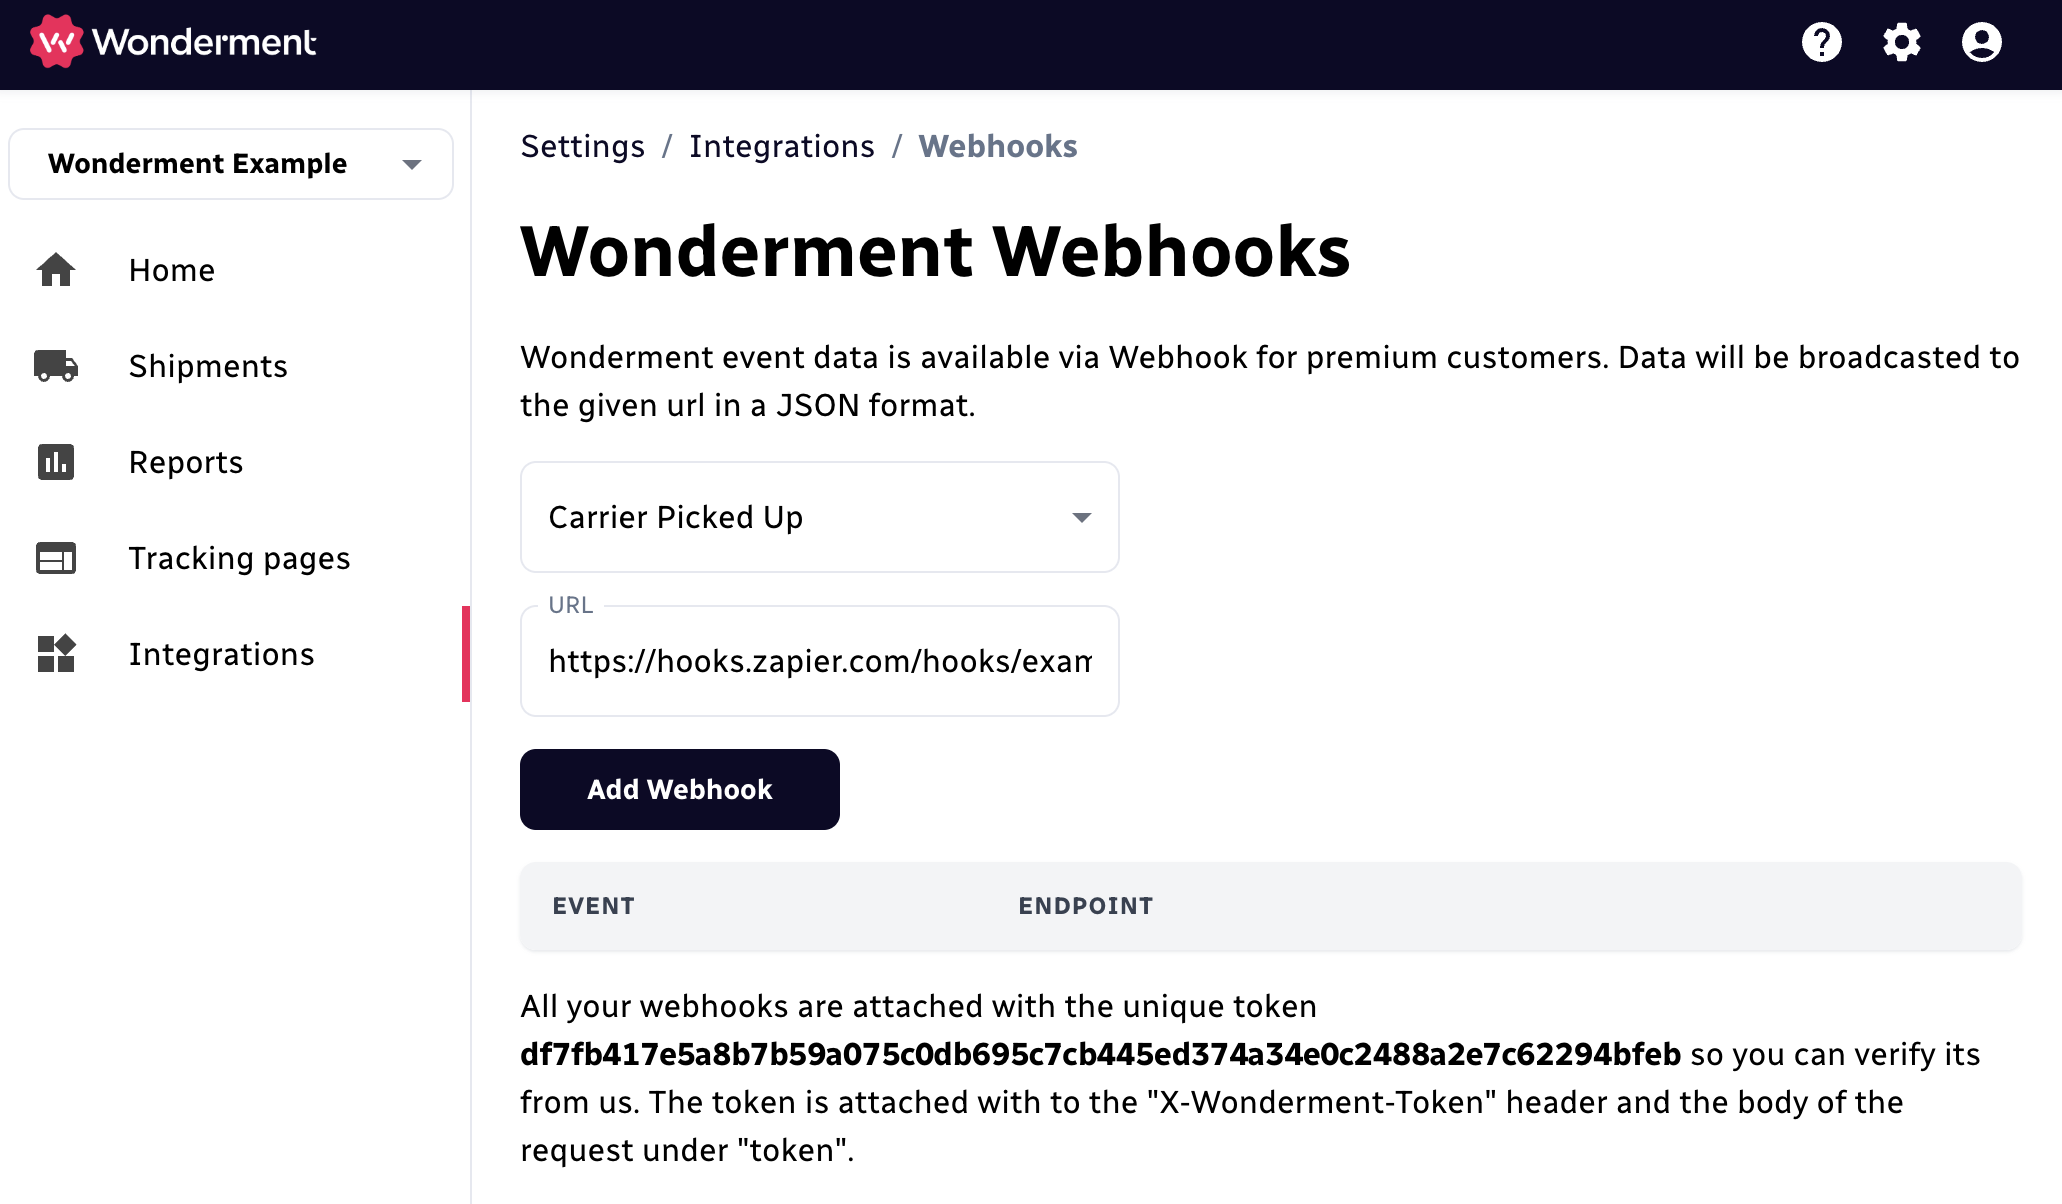
Each webhook request comes with a security token attached to it as a data field. This can be used to validate that a request was sent from Wonderment to your webhook URL, and not from another source (potentially spam, bot, or whatever etc.) You’re not required to use it, but it can be useful if you’re concerned about data validation.
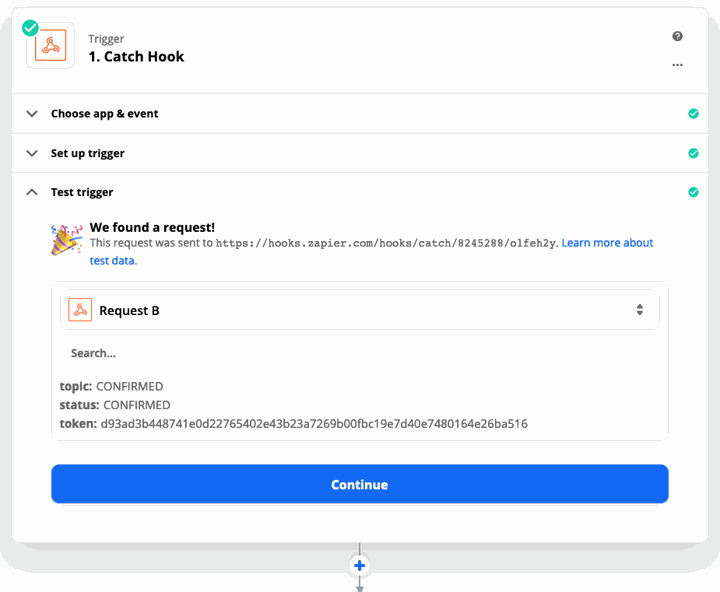
Return to Zapier and click “Test Trigger”. If you sent a test request from Wonderment, it should appear here immediately!
Here’s a successful test in Zapier:
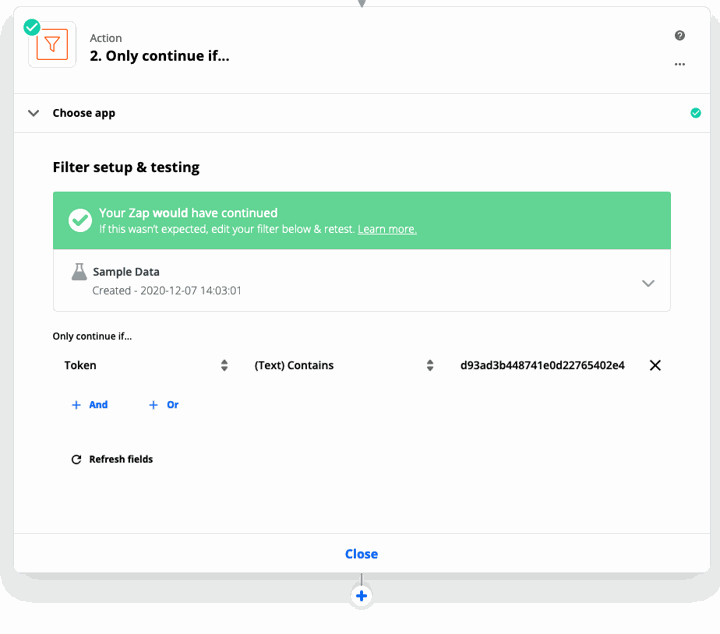
If you’d like to use the secret to filter out any potentially incorrect data, add a Filter Action step below, like this one:
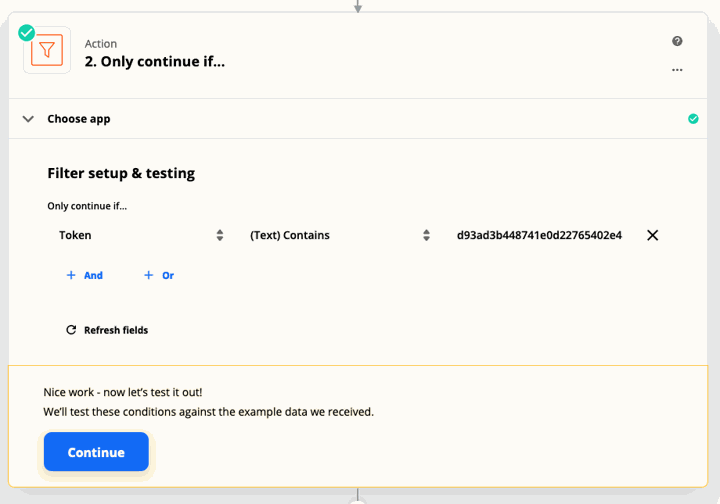
Click “Continue” and you can validate that the secret key is the same in your request and your filter. You should see the green status message here. If you don’t, check and make sure you have the same key in the Filter step as shown in your Settings screen. The key is the same for all your webhooks. It is unique per store.
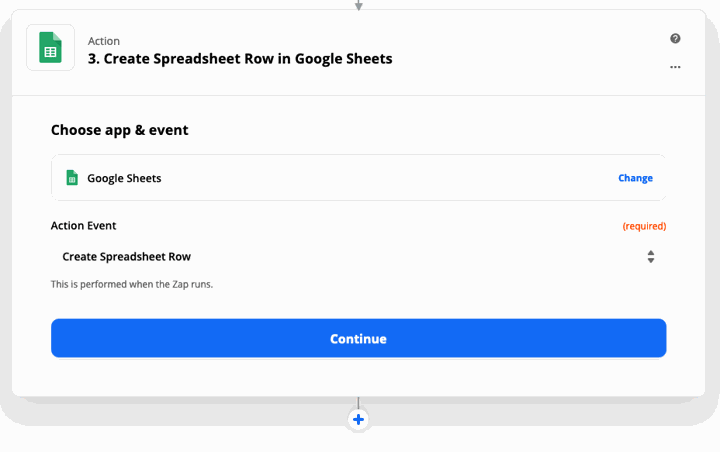
Finally, add whatever action steps you’d like to use with this data. For example, you can populate a spreadsheet with data about stalled shipments: